Designing a sweater: behind the scenes

For those who have wondered how I design my knit and crochet patterns, HERE IT IS! Thought I’d share my process with you to give a boost for those who have been thinking of writing their first pattern.So this post is about how to create a crochet sweater. The process is long and time consuming as it is a replan On the right you can see Cromwell sweater on Iti, this is the one I’m going to walk you through.
I have been designing for 5 years now and have learned everything on my own. Not sure if I’m everything right, or even close, but I’m getting a lot of positive feedback from my customers, so guess I’m doing ok.
A lot of Excel
After making a swatch it’s time to do some Excel. When I started designing, and even now when making some easy hat or smaller pattern, I first made the piece and wrote down the notes. But writing down the pattern before actually starting on the project gives you an option to be a tester yourself and see if everything matches up.I have a big excel file with many of my designs in different sheets. The excel contains all the average measurements of kids and adults where I add the positive or negative ease.For the Cromwell sweater I calculated 4” (10 cm) of positive ease around the chest adding extra width to armholes length etc. The challenge with this sweater is that I want to make it in all sizes, that is 9 sizes! Designing for kids where the differences are small and you can not use long pattern repeats are a lot harder than designing something in three or for adult sizes.
I do not make all the calculations before starting as there might be something I want to change, so I would need to go back and edit, but for a sweater I calculate the yoke and test it out with the sample, then the sleeves and body. So excel is for calculating the needed number of stitches or length, I do use Microsoft Word to write down and do notes along the process. handwriting doesn’t really help me although it is more convenient than having a laptop open all the time. The level of notes is not high, I just make few notes on the size I’m making like “repeat Round 3, three times more with 1 hdc in each hdc”.
Getting ready for testing
When I finish with the sample, I go and edit all my notes in Word and add the missing sizes with needed stitch counts and lengths, I write all measurements both in metric and inches, here is where Excel comes really handy. Although using Excel makes calculating a lot easier, I have to manually round some stitches and check if they match with the pattern repeat so it still is a lot of work.
The tricky part of the pattern writing is to estimate the yarn amount needed for each size. I’ve noticed that depending on the yarn you use, the yardage (or grams) can differ a lot even with the same pattern and size. What I do I usually weigh my finished piece and use excel for calculating the other sizes amounts based on the measurements.
When the sample is ready and pattern written down, comes the hardest part - convince one of my girls to model for a picture. Everything has to be right, their mood, the music playing on the background, the lighting and the candy they’re getting afterwards. Really important to have all those things right for a decent photo.
The camera I use is Sony a7R with a FE 1.8/50 lens. Have been using this one for years and happy with the results, although my Iphone XR doesn’t fall that far behind:) I did take some photography courses at some point but to be honest, the camera does all the work.
I use Lightroom for editing the photos, I know that there are many apps that will do the same job but haven’t tried those.
Testing
All patterns need to be tested! This is something I struggled on my early days but this is the only way you’ll learn and can sell the patterns with confidence.
I use Ravelry forum for testing my designs. I have so many lovely ladies who have been testing for me for years but each test there is someone new. After sending out the pattern to testers and setting the deadline which usually is 1-1.5 months, it’s time to start on the next project. Testers will be reporting with errors and rephrasing, so checking the forum at least once a day is a must.
For this Cromwell sweaters I had 10 testers, here are some beautiful finished pictures of the same design. Thank you so much for making this pattern happen!
Second sample
To be sure of the fit, as I mentioned above, I wanted to make another sample in the adult sizes. Chose Katia Yarn’s Velvet yarn for making the adult sample. It took about 3 weeks to finish this one, and here’s a picture of me wearing it on my birthday.
April 20th - publishing the pattern
It has been 3 months since I started on this project, this shows how much work and time goes into one design.
Finishing a pattern is about half a days work - adding all the suggestions, printing the pattern out again and checking myself. Making banners, I use Bannersnack for making some cover photos or marketing materials for my designs.
I list all my designs to Etsy, Ravelry and LoveCrafts sites, also to my own website which is recently made with Squarespace.
Publishing the design and sharing it with my fans is always the highlight of the process!
Hope you enjoyed reading and found something useful. Don’t hesitate to try designing yourself, you don’t need 20 years of experience in knitting or crochet to do that (I’m really bad in crochet actually.. ;) just start with something simple and in one or two sizes,
Comment and ask, happy to receive some feedback or help out with questions!
Marie
Below the pattern!
Sweater crochet pattern, jumper crochet pattern | CROMWELL pullover
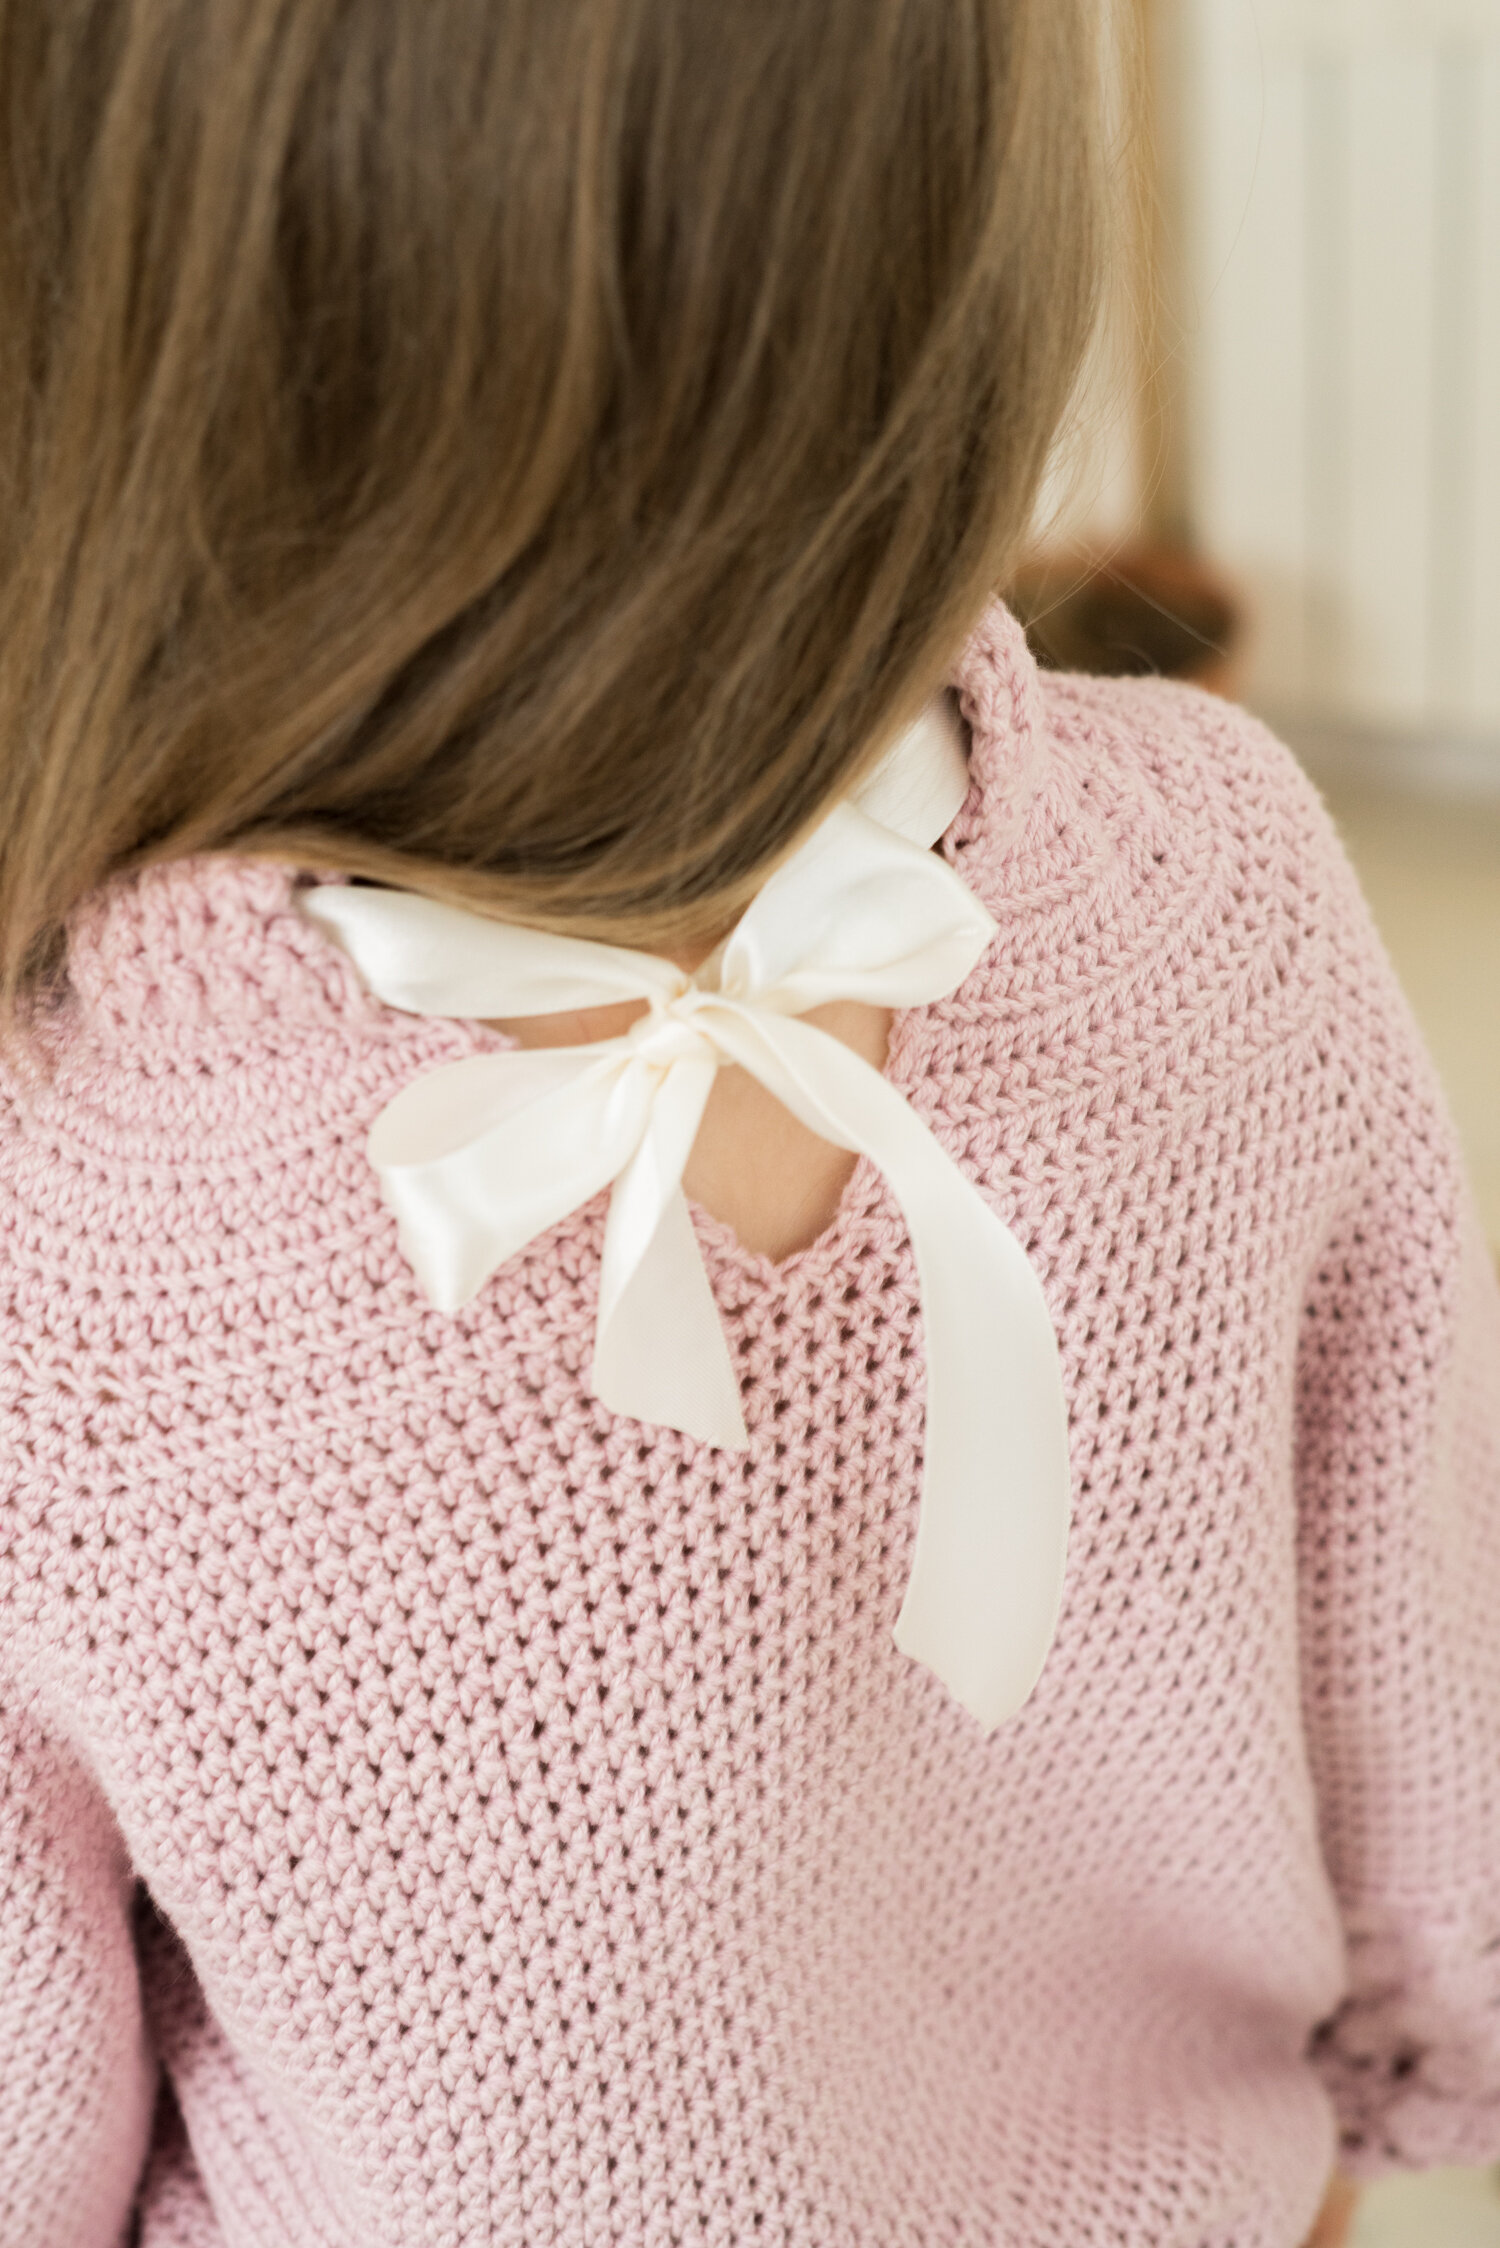
Looking for a cozy and feminine sweater for your little girl? Look no further than the Cromwell sweater! With textured puffy sleeves and a delicate ribbon bow at the back, this sweater is a must-have staple item in any wardrobe. The raglan design is full of easy stitches and has enough positive ease for a comfortable fit. Knit it up as a beautiful handmade gift that's sure to be treasured.
✔ Instant download PDF file crochet pattern in English
🎁 You get a FREE gift pattern with this design!
✔ Skill level: intermediate
✔ Sizes: 1; 2-3; 4-5; 6-7; 8-10-year-old; S; M; L; XL
✔ You need:
Worsted (9 wpi; 10 ply; no 4: Medium) weight yarn that gives you the needed gauge 325-1260g or 710-2770 yards
Crochet hook US E/4 (3.5 mm) or the size that gives you the gauge 4” x 4” (10 x 10 cm) = 18 sts x 14 rows (in half double crochet)
1 inch (3 cm) wide ribbon about 40” (1 m)
✔ Crochet stitches used (US): chain, single crochet, double crochet, half double crochet, crochet 2 stitches together, front and back post crochet, through back loop only
COPYRIGHT:
My patterns and photos are copyrighted and may not be distributed. Finished items made from the patterns may be sold but please give credit to Muki Crafts. Thank you.
DISCLAIMER:
You will receive a digital pattern, nothing will be mailed to you